Front power seat adjustment
FRONT POWER SEAT ADJUSTMENT
Operating tips
- The power seat motor has an auto-reset overload protection circuit. If the motor stops during operation, wait 30 seconds, then reactivate the switch.
- Do not operate the power seat switch for a long period of time when the engine is off.
This will discharge the battery.
See Automatic drive positioner in Pre-driving checks and adjustments for automatic drive positioner operation.
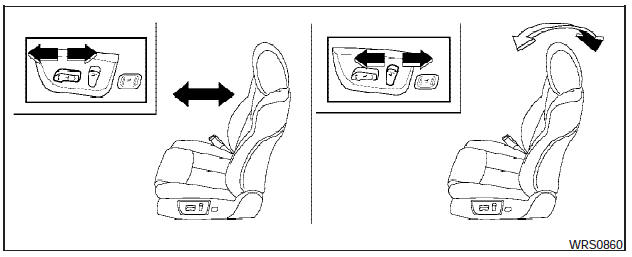
Forward and backward
Moving the switch forward or backward will slide the seat forward or backward to the desired position.
Reclining
Move the recline switch backward until the desired angle is obtained. To bring the seatback forward again, move the switch forward and move your body forward. The seatback will move forward.
The reclining feature allows adjustment of the seatback for occupants of different sizes for added comfort and to help obtain proper seat belt fit (see Precautions on seat belt usage later in this section). Also, the seatback can be reclined to allow occupants to rest when the vehicle is stopped and the shift selector is in P (Park).
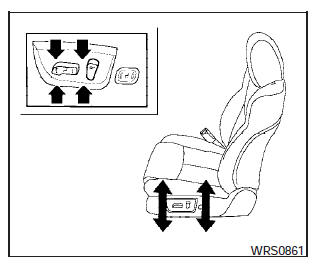
Seat lifter (drivers seat)
Push the front or rear end of the switch up or down to adjust the angle and height of the seat cushion.
Manual (if so equipped)
Lumbar support (drivers seat)
The lumbar support feature provides lower back support to the driver. Move the lever up or down (manual) or move the switch forward or backward (power) to adjust the seat lumbar area.
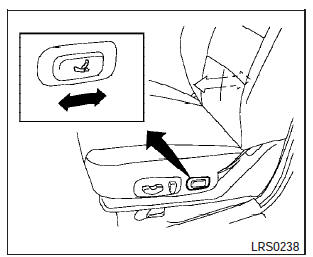
Power (if so equipped)
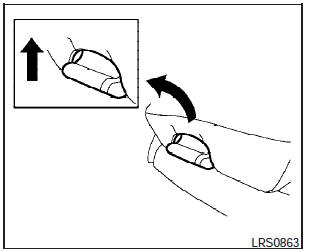
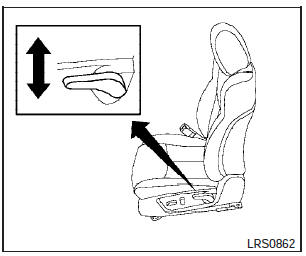
Thigh extension (drivers side only, if
so equipped)
Pull up and hold the lever to extend the front portion to the desired position.
See also:
Heater and air conditioner (automatic) (Type B)
Type B
1. Temperature control dial (drivers side)/
AUTO (automatic) climate control ON
button
2. A/C (air conditioner) ON/OFF button
3. Air recirculation button
4. Fresh air intake butto ...
Waxing
Regular waxing protects the paint surface and
helps retain new vehicle appearance. Polishing is
recommended to remove built-up wax residue
and to avoid a weathered appearance before
re-applyin ...
Programming HomeLink
1. To begin, press and hold the two outer
HomeLink buttons (to clear the memory)
until the indicator light 1 blinks (after 20
seconds). Release both buttons.
2. Position the end of the hand-held ...