FM/AM/SAT radio operation
FM·AM button:
Press the FM·AM button to change the band as follows.
AM → FM1 → FM2 → AM
If another audio source is playing when the FM·AM button is pressed, the audio source playing will automatically be turned off and the last radio station played will begin playing.
The FM stereo indicator (ST) is shown on the screen during FM stereo reception. When the stereo broadcast signal is weak, the radio automatically changes from stereo to monaural reception.
XM band select:
Pressing the XM button will change the band as follows.
XM1* → XM2* → XM3* → XM1* (satellite, if so equipped)
When the XM button is pressed while the ignition switch is in the ACC or ON position, the radio will come on at the last station played.
The last station played will also come on when the VOL/ON-OFF control knob is pressed to turn the radio on.
*When the XM button is pressed, the satellite radio mode will be skipped unless an optional satellite receiver and antenna are installed and an XM satellite radio service subscription is active.
Satellite radio is not available in Alaska, Hawaii and Guam.
If a compact disc is playing when the XM button is pressed, the compact disc will automatically be turned off and the last radio station played will come on.

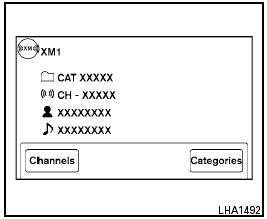
While the radio is in XM mode, the operation can be controlled through the touchscreen. Touch the “Channels” key to display a list of channels.
Touch a channel displayed on the list to change to that channel. Touch the “Categories” key to display a list of categories. Touch a category displayed on the list to display options within that category.

Tuning with the touchscreen:
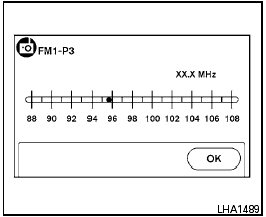
When in AM or FM mode, the radio can be tuned using the touchscreen. To bring up the visual tuner, touch the “Tune” key on the lower right corner of the screen. A screen appears with a bar running from low frequencies on the left to high frequencies on the right. Touch the screen at the location of the frequency you wish to tune and the station will change to that frequency. To return to the regular radio display screen, touch the “OK” key.
Tuning with the TUNE/SCROLL knob:
The radio can also be manually tuned using the TUNE/SCROLL knob. When in FM or AM mode, turn the TUNE/SCROLL knob to the left for lower frequencies or to the right for higher frequencies.
When in XM mode, turn the TUNE/SCROLL knob to change the channel.

SEEK tuning:
When in FM or AM mode, press the
SEEK/CATEGORY button  or
or  to
tune from low to high or high to low frequencies
and to stop at the next broadcasting station.
When in XM mode, press the SEEK/CATEGORY
button  or
or
 to change the category.
1 to 6 Station memory operations:
Twelve stations can be set for the FM band (6 for FM1, 6 for FM2) and six stations can be set for the AM band. Eighteen stations can be set for the XM band (6 for XM1, 6 for XM2, 6 for XM3).
1. Choose the radio band AM, FM1 or FM2 using the FM·AM select button or choose the radio band XM1, XM2 or XM3 using the XM button.
2. Tune to the desired station using manual or seek tuning. Press and hold any of the desired station memory buttons (1 – 6) until a beep sound is heard.
3. The channel indicator will then come on and the sound will resume. Programming is now complete.
4. Other buttons can be set in the same manner.
If the battery cable is disconnected or if the fuse opens, the radio memory will be canceled. In that case, reset the desired stations.
See also:
Vehicle identification number (chassis number)
The vehicle identification number is located as
shown.
Remove the cover to access the number. ...
Seats
● Do not ride in a moving vehicle when
the seatback is reclined. This can be
dangerous. The shoulder belt will not
be against your body. In an accident,
you could be thrown into it a ...
Wet brakes
When the vehicle is washed or driven through
water, the brakes may get wet. As a result, your
braking distance will be longer and the vehicle
may pull to one side during braking.
To dry brakes, ...
