Exterior and interior lights
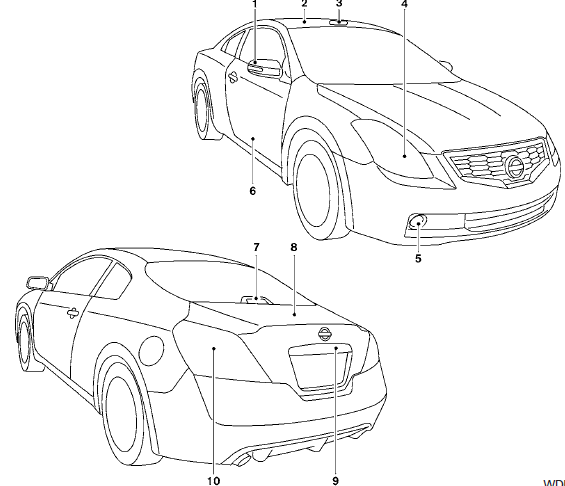
Coupe
1. Mirror-mounted turn signal light
(if so equipped)
2. Interior light
3. Map light
4. Headlamp assembly
5. Fog light (if so equipped)
6. Step light
7. High-mount stoplight
8. Trunk light
9. License plate light
10. Rear combination light
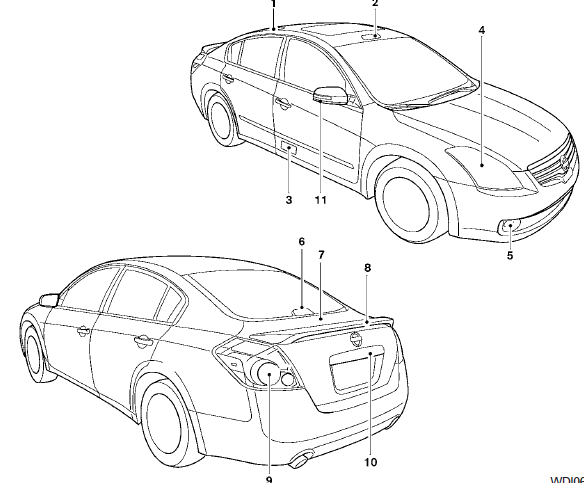
Sedan
1. Rear map light
2. Front map light
3. Step light
4. Headlamp assembly
5. Fog light (if so equipped)
6. High-mount stoplight (if so equipped)
7. Trunk light
8. Spoiler mounted stoplight
(if so equipped)
9. Rear combination light
10. License plate light
11. Mirror-mounted turn signal light
(if so equipped)
Replacement procedures
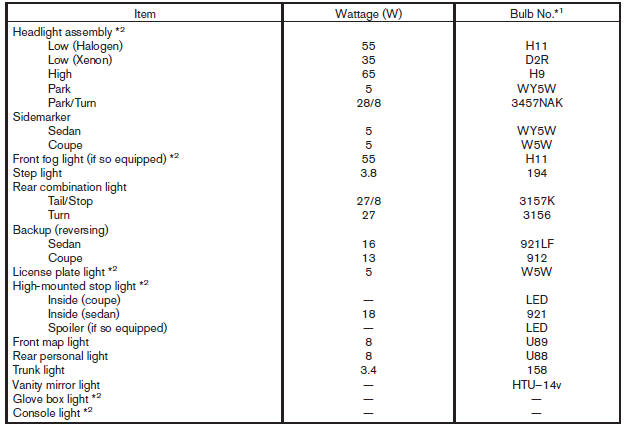
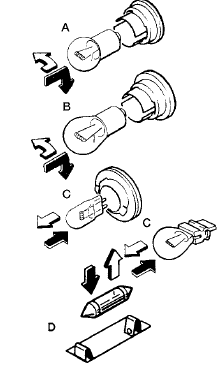
All other lights are either type A, B, C or D. When replacing a bulb, first remove the lens, light and/or cover.
 Indicates bulb removal
 Indicates bulb installation
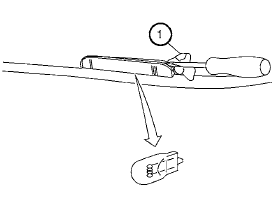
Step light
Use a cloth 1 to protect the housing.
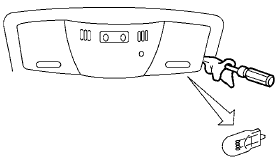
Map light
Use a cloth to protect the housing.
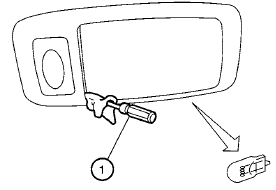
Personal light (if so equipped)
Use a cloth 1 to protect the housing.
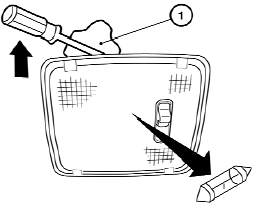
Interior light
Use a cloth 1 to protect the housing.
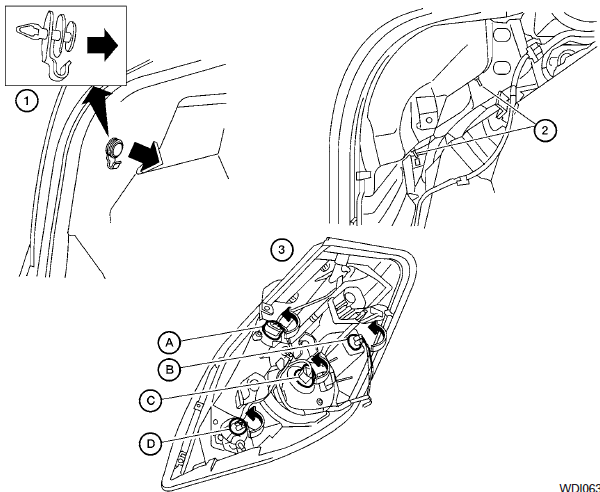
Rear combination light
To access the bulbs in the rear combination light:
1 Remove the fasteners. Carefully push back the carpet.
2 Remove the 2 nuts and pull out the rear combination light.
3 Rotate the bulb(s) counterclockwise and pull out to remove:
A Turn signal light
B Sidemarker light
C Tail/stop light
D Backup light
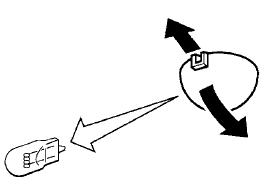
Trunk light
See also:
Towing a trailer
Overloading or improper loading of a
trailer and its cargo can adversely affect
vehicle handling, braking and performance
and may lead to accidents.
- Do not tow a trailer or haul a hea ...
Exterior rear
1. Trunk lid
2. Vehicle loading
3. Interior trunk lid release
4. Rear window defroster switch
5. Child safety locks
6. Fuel-filler door
7. Fuel-filler cap, fuel recommendation
8. Repla ...
Brake pad wear warning
The disc brake pads have audible wear warnings.
When a brake pad requires replacement, it
will make a high pitched scraping sound when
the vehicle is in motion. This scraping sound will
first o ...
