Speedometer and odometer
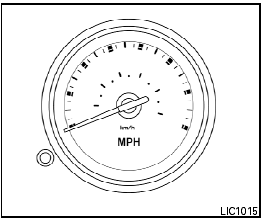
Speedometer

Odometer/Twin trip odometer
The odometer/twin trip odometer is displayed when the ignition switch is placed in the ON position.
The odometer records the total distance the vehicle has been driven.
The twin trip odometer records the distance of individual trips.
To switch between the odometer and the twin trip odometers press the instrument brightness control/change button.
Changing the display:
Push the instrument brightness control/change button to change the display as follows:
With twin trip odometer:
Odometer → Trip A → Trip B → Odometer
With trip computer:
Odometer → Trip A → Trip B → DTE → Instant Fuel Economy → Average Fuel Consumption → Average Speed → Journey time → Odometer
Resetting the trip odometer:
Push the instrument brightness control/change button for more than 1 second to reset the currently displayed trip odometer to zero.
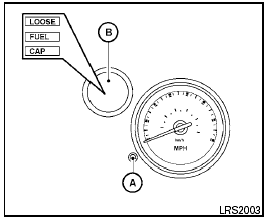
Loose fuel cap warning message
Push the reset button A for more than 1 second to reset the LOOSE FUEL CAP warning message B after the fuel cap has been tightened.
For additional information see “Fuel-filler cap” in the “Pre-driving checks and adjustments” section of this manual.

Check tire pressure warning message (if so equipped)
The CHECK TIRE PRESSURE warning message is displayed when the low tire pressure warning light is illuminated and low tire pressure is detected.
Check and adjust the tire pressure to the recommended COLD tire pressure shown on the Tire and Loading Information label. The CHECK TIRE PRESSURE warning message turns off when the low tire pressure warning light turns off.
The low tire pressure warning light remains illuminated until the tires are inflated to the recommended COLD tire pressure. The CHECK TIRE PRESSURE warning message is displayed each time the ignition switch is placed in the ON position as long as the low tire pressure warning light remains illuminated. For more information see “Low tire pressure warning light” in the “Instruments and controls” section, “Tire Pressure Monitoring System (TPMS)” in the “Starting and driving” and “Wheels and tires” section in the “Maintenance and do-it-yourself” section of this Owner’s Manual.
See also:
Lift gate release
Lift gate release
If the lift gate cannot be opened due to a
discharged battery, follow these steps.
1. Remove the cover inside of the lift gate with
a suitable tool.
2. Move the lever toward ...
Brake pad wear warning
The disc brake pads have audible wear warnings.
When a brake pad requires replacement, it
will make a high pitched scraping sound when
the vehicle is in motion. This scraping sound will
first o ...
Safety
The 2007 Nissan Altima received a Good rating — the highest possible — in the
Insurance Institute for Highway Safety's frontal-offset crash test. As of
publication, IIHS hasn't subjected the A ...