Front power seat adjustment
FRONT POWER SEAT ADJUSTMENT
Operating tips
- The power seat motor has an auto-reset overload protection circuit. If the motor stops during operation, wait 30 seconds, then reactivate the switch.
- Do not operate the power seat switch for a long period of time when the engine is off.
This will discharge the battery.
See Automatic drive positioner in Pre-driving checks and adjustments for automatic drive positioner operation.
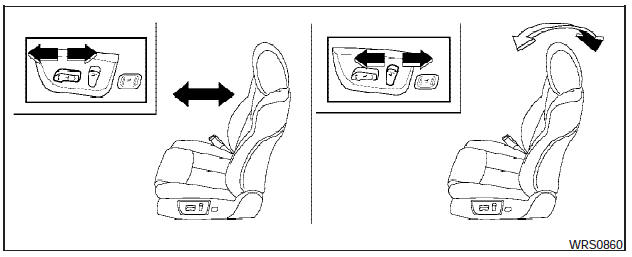
Forward and backward
Moving the switch forward or backward will slide the seat forward or backward to the desired position.
Reclining
Move the recline switch backward until the desired angle is obtained. To bring the seatback forward again, move the switch forward and move your body forward. The seatback will move forward.
The reclining feature allows adjustment of the seatback for occupants of different sizes for added comfort and to help obtain proper seat belt fit (see Precautions on seat belt usage later in this section). Also, the seatback can be reclined to allow occupants to rest when the vehicle is stopped and the shift selector is in P (Park).
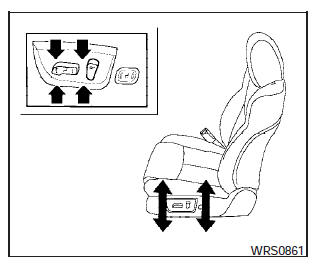
Seat lifter (drivers seat)
Push the front or rear end of the switch up or down to adjust the angle and height of the seat cushion.
Manual (if so equipped)
Lumbar support (drivers seat)
The lumbar support feature provides lower back support to the driver. Move the lever up or down (manual) or move the switch forward or backward (power) to adjust the seat lumbar area.
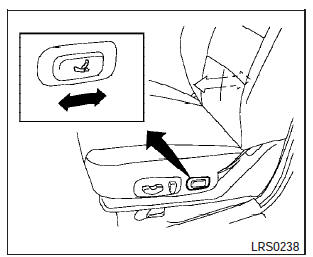
Power (if so equipped)
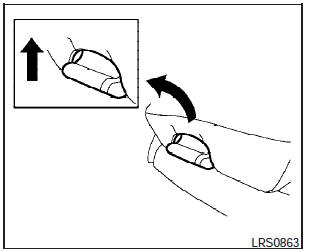
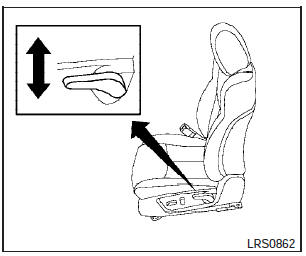
Thigh extension (drivers side only, if
so equipped)
Pull up and hold the lever to extend the front portion to the desired position.
See also:
OFF position
When the switch is in the OFF position 3 , the
map lights will not illuminate, regardless of the
condition. ...
Precautions on seat belt usage
If you are wearing your seat belt properly
adjusted, and you are sitting upright and well
back in your seat with both feet on the floor, your
chances of being injured or killed in an accident
...
SAFETY
For the kids, the Juke was fun, too. They loved the way it looked, but there
was a problem with the seat belts. The buckles were too buried in the seat
cushions to make them easy to use for my 6- ...