Rear-facing child restraint installation using the seat belts
Rear-facing child restraint installation using the seat belts
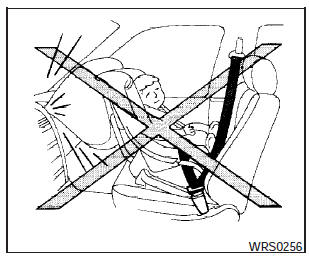
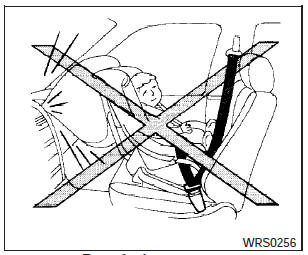
WARNING:
The three-point seat belt with Automatic Locking Retractor (ALR) must be used when installing a child restraint. Failure to use the ALR mode will result in the child restraint not being properly secured. The restraint could tip over or be loose and cause injury to a child in a sudden stop or collision. Also, it can change the operation of the front passenger air bag. See Front passenger air bag and status light later in this section.
Rear-facing step 1
Refer to all Warnings and Cautions in the Child Safety and Child Restraint sections before installing a child restraint.
Follow these steps to install a rear-facing child restraint using the vehicle seat belts in the rear seats:
1. Child restraints for infants must be used in the rear-facing direction and therefore must not be used in the front seat. Position the child restraint on the seat.
Always follow the restraint manufacturers instructions.

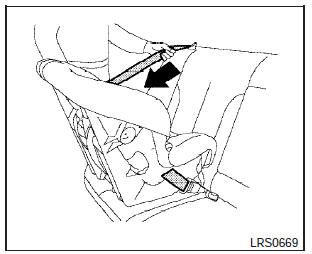
Rear-facing step 2
2. Route the seat belt tongue through the child restraint and insert it into the buckle until you hear and feel the latch engage. Be sure to follow the child restraint manufacturers instructions for belt routing.
Rear-facing step 3
3. Pull the shoulder belt until the belt is fully extended. At this time, the seat belt retractor is in the Automatic Locking Retractor (ALR) mode (child restraint mode). It reverts to the Emergency Locking Retractor (ELR) mode when the seat belt is fully retracted.
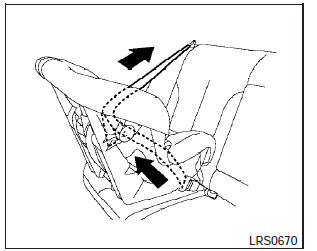
Rear-facing step 4
4. Allow the seat belt to retract. Pull up on the shoulder belt to remove any slack in the belt.
Rear-facing step 5
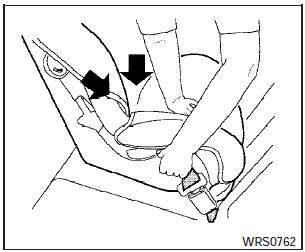
5. Remove any additional slack from the seat belt; press downward and rearward firmly in the center of the child restraint to compress the vehicle seat cushion and seatback while pulling up on the seat belt.
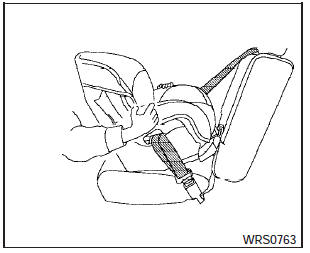
Rear-facing step 6
6. After attaching the child restraint, test it before you place the child in it. Push it from side to side while holding the child restraint near the seat belt path. The child restraint should not move more than 1 inch (25 mm), from side to side. Try to tug it forward and check to see if the belt holds the restraint in place.
If the restraint is not secure, tighten the seat belt as necessary, or put the restraint in another seat and test it again. You may need to try a different child restraint. Not all child restraints fit in all types of vehicles.
7. Check to make sure that the child restraint is properly secured prior to each use. If the seat belt is not locked, repeat steps 3 through 6.
After the child restraint is removed and the seat belt fully retracted, the ALR mode (child restraint mode) is canceled.
See also:
Sun visors
Sun visors
To block out glare from the front, swing down the
sun visor 1 .
To block glare from the side, disconnect the sun
visor from the center mount and swing it to the
side 2 . ...
Emission control system warranty
Your NISSAN vehicle is covered by the following
emission warranties:
For USA
1. Emission Defects Warranty
2. Emissions Performance Warranty
Details of this warranty may be found with other
vehic ...
History
In 1993, Nissan discontinued its much-criticized Stanza compact car,
replacing it with the US-made Altima, originally as a compact car. The very
first Altima rolled off the assembly line on June 1 ...