Indicators for maintenance
Indicators for maintenance
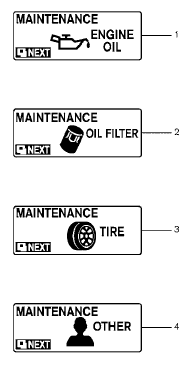
1. Engine oil replacement indicator This indicator appears when the customer set distance comes for changing the engine oil. You can set or reset the distance for changing the engine oil. See “Maintenance mode” earlier in this section.
2. Oil filter replacement indicator This indicator appears when the customer set distance comes for replacing the oil filter. You can set or reset the distance for replacing the oil filter. See “Maintenance mode” earlier in this section.
3. Tire replacement indicator This indicator appears when the customer set distance comes for replacing tires. You can set or reset the distance for replacing tires. See “Maintenance mode” earlier in this section.
WARNING
The tire replacement indicator is not a substitute for regular tire checks, including tire pressure checks. See “Changing Wheels and Tires” in “Maintenance & Do- It-Yourself” section. Many factors including tire inflation, alignment, driving habits and road conditions affect tire wear and when tires should be replaced. Setting the tire replacement indicator for a certain driving distance does not mean your tires will last that long. Use the tire replacement indicator as a guide only and always perform regular tire checks. Failure to perform regular tire checks, including tire pressure checks could result in tire failure. Serious vehicle damage could occur and may lead to a collision, which could result in serious personal injury or death.
4. “OTHER” indicator
This indicator appears when the customer set distance comes for checking or replacing maintenance items other than the engine oil, oil filter and tires. Other maintenance items can include such things as air filter or tire rotation. You can set or reset the distance for checking or replacing the items. See “Maintenance mode” earlier in this section. For scheduled maintenance items and intervals, see your “NISSAN Service and Maintenance Guide.”
See also:
Coat hooks (if so equipped)
Coat hooks (if so equipped)
The coat hooks are equipped above the rear
window.
Do not apply a total load of more than 2
lb (1 kg) to a single hook. ...
Bluetooth settings
To set up the Bluetooth Hands-Free Phone
System to your preferred settings, press the SETTING
button on the instrument panel and select
the “Bluetooth” key on the display.
Bluetooth:
Turn t ...
Grocery hooks
The grocery hooks are located in the trunk and
can be used to hang a standard size plastic
grocery bag.
CAUTION
Do not apply a total load of more than 20
lbs (9 kg) to a single grocery hook. ...